
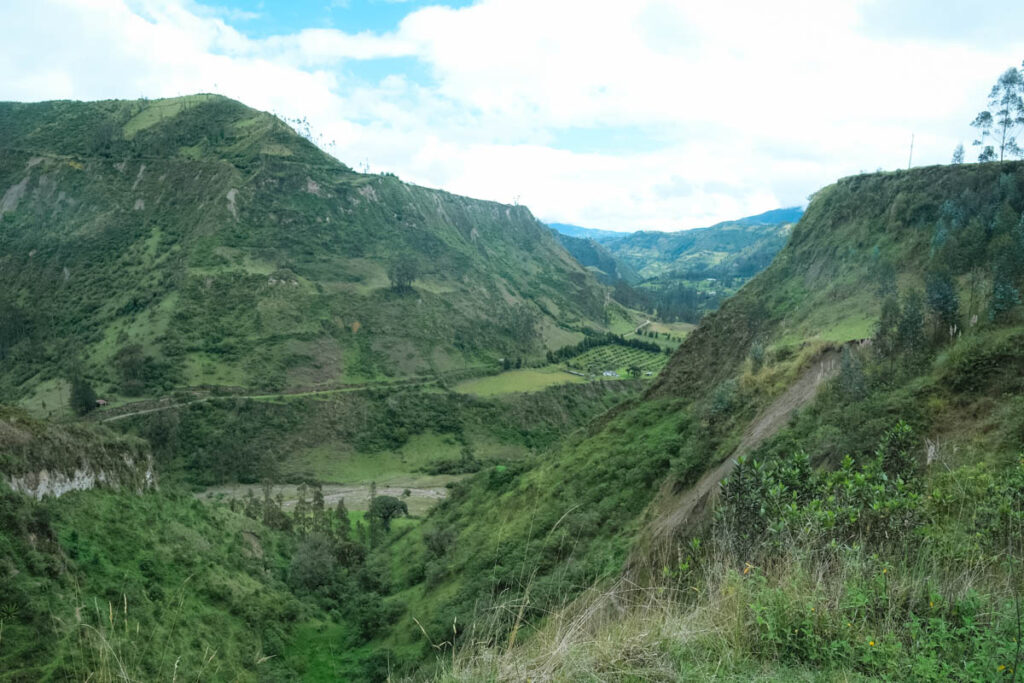
The stunning Quilotoa Loop (sometimes misspelled at the Quiltoa Loop) travels from town to town up the River Valley of the Sique River. This incredible hike can be done over several days in either direction and either starts of ends at the gorgeous Quilotoa Crater Lake. We hiked the Quilotoa Loop over 3 days starting in Sigchos and ending in Quilotoa and have put together this post with a Quilotoa loop map and basic hiking tips.
Below you can find maps and tips for hiking the Quilotoa Loop, but if you want complete details of how to hike this epic trail, make sure to check out our: Complete Guide of the Quilotoa Loop.
If you are looking for other ways to visit Quilotoa Lake, check out: How to Visit Quilotoa Crater Lake.
I’ve spent decades exploring family adventures, epic hikes, and National Parks across the world. For more inspiration, check out my National Parks Page or see some of my favorite destinations to plan your next adventure and make sure to join my weekly newsletter.
Overview of the Quilotoa Loop
The Quilotoa Loop is typically done as a 3 day hike that covers roughly 24 miles. Most people hike the route from north to south starting in Sigchos and ending in Quilotoa. This is the harder way to hike the loop but you get to increase your elevation each day and end the hike the crater lake. With this option, you will gain about 8,000 feet of elevation over the 3 days.
Hiking the Quilotoa Lake from Quilotoa to Sigchos is easier, but since you descend down into the river valley each day, you will still have a climb. In this direction, the hike still involves about 5,500 feet of elevation gain, and you end at the unimpressive town of Sigchos.

Tips and Things to Know about the Quilotoa Loop
- The first thing to know is that this hike isn’t actually a loop. The loop is only completed by taking a bus from Latacunga to Sigchos and from Quilotoa to Latacunga. The hike itself is a one way trek.
- Since the hike travels from town to town, it’s easy to arrange hostels to sleep and eat at along the way. Most of these places will allow you to camp, but the easiest way to hike this trail is stay in hostels along the way.
- Most hostels include breakfast and dinner and will make a bag lunch for a fee. These lunches are a great idea for the trail and relatively inexpensive.
- This is a hard hike!! We did this hike as a family with 14 year old twins and an 11 year old. We hike a lot as a family and still found this hike challenging, especially with the overall elevation.
- This hike reaches up to 12,770 feet. If you are coming from sea level, give yourself some time acclimate with a day or two in Quito or Latacunga.
- One of the other things we read a lot about was the dogs along the trail. Dogs will bark at you or follow you on the trail. We never encountered a truly aggressive dog – just dogs defending their home. If a dog does come towards you, reach down like you are picking up a rock and they will back off. We also carried hiking poles which could have been used if needed.
- Some people pass out candy to kids along the trail. Please don’t do this. If you want to help the locals, ask at the hostels in town or buy hand goods along the way (read more about being a responsible traveler)
Getting to and From the Quilotoa Loop Hike
The easiest way to get to the start of the hike is to take a bus from Latacunga. Buses run several times a day. Most people will spend the night in Latacunga and take a morning bus so they have time to hike from Sigchos to Isinlivi the first night. The hike takes about 3-5 hours. We caught the 8 am bus and were in Sigchos ready to start the hike by around 9:45.
It is possible to spend the night in Sigchos as well – check out Hosteria San Jose de Sigchos.
If you are hiking the route in reverse, you can also get the bus from Latacunga to Quilotoa.
After you’ve finished hiking the Quilotoa loop, you will need to get Quilotoa back to Latacunga (of if you are hiking in reverse from Sigchos to Latacunga). Buses run relatively regularly from Quilotoa to Latacunga. If there are no buses, you can also get a ride from Quilotoa down to the bigger town of Zumbahua where there are more frequent buses. This is not hard and plenty of people will ask if you want a ride.
*Note that they may tell you in the town of Quilotoa that the bus is done running for the day even if there will be another bus just so they can give you a ride. Rides cost about $1/person.
Complete Quilotoa Loop Map
Maps of Each Day of the Quilotoa Loop
In the next few sections you can see maps of each day of the Quilotoa Loop Hike. There are a few things to know about the Quilotoa Loop Maps and hiking trails. The most important thing you can do is to download the app – maps.me and download the Ecuador hiking map so you can use the app offline. This is the best map to help you get around and keep you from getting lost.
- The trails are somewhat well marked and it’s possible to find your way using the trail signs – sometimes.
- There are multiple ways to hike between the towns, especially between Isinlivi and Chigchilan
- Several of the trails have exposed sections and drop offs
- Most hostels can help you with directions for the upcoming day and even provide maps or downloads to help you navigate
- Trails and roads can get washed out so be prepared to adjust your hike as needed
- You will likely get lost – but this truly isn’t a big deal as long as you have maps.me or you can ask a local along the trail
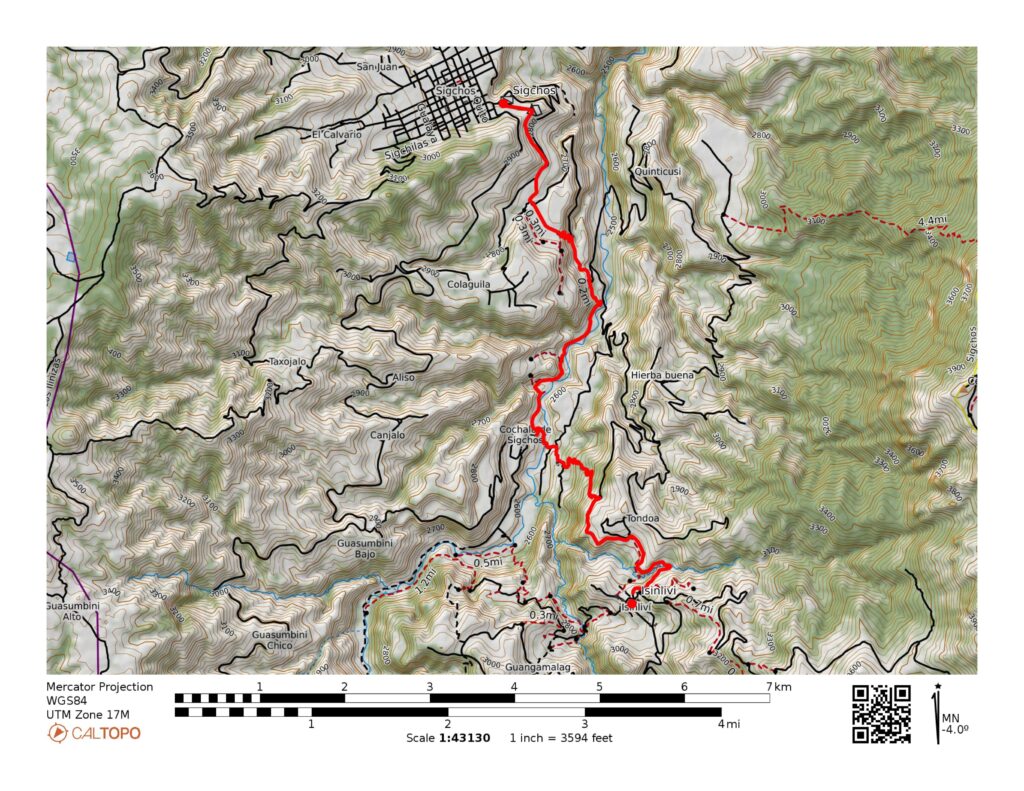
Map of Quilotoa Loop Day 1: Sigchos to Isinlivi
Distance: 7 miles
Elevation Gain: 1,600 feet
Difficulty: Challenging
Time: 3-5 hours
From the bus stop in Sigchos, head southeast to the start of the trail. Follow dirt roads for the first part of your hike and begin the slow descent down into the river valley. There are several sections where you will take a trail and cut down to a lower road. As you follow the road downhill you will get to a bridge across the river – the best hiking trail from here turns right just before the bridge and follows the river on the west side of the river.
After about 1 km, take the trail down to the river and cross on a small bridge. From here the trail begins to ascend steeply up the other side of the valley with a number of switchbacks through farms. You do almost all the elevation gain for the day along this part of the trail.
At the top of the hill you will reach a road. Turn left for a short distance and then follow the trail to the right to Isinlivi. The walk on the road is about 1.5 km.
Spend the night at Llullu Llama.
See our review of Llullu Llama Mountain Resort.
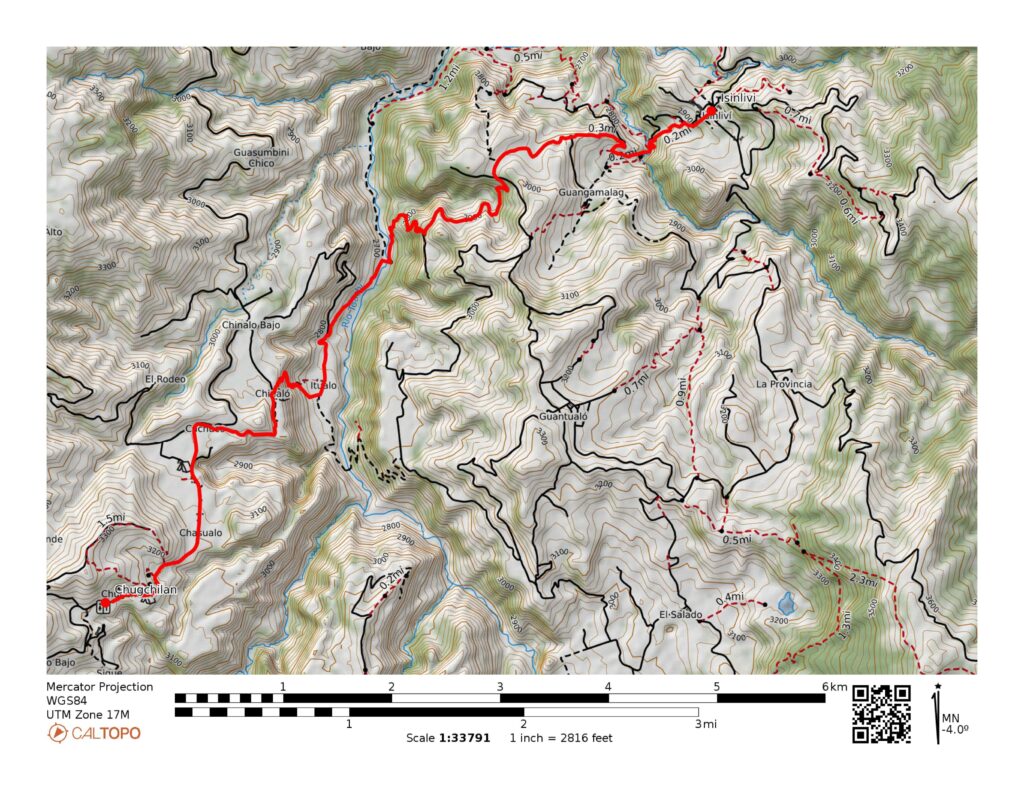
Map of Quilotoa Loop Day 2: Isinlivi to Chugchilan
Distance: 7.5 miles
Elevation Gain: 2,200 feet
Difficulty: Challenging
Time: 4-6 hours
There are several different ways to hike from Isinlivi to Chugchilan. We started the hike by descending down the road that leads from Isinlivi. Cross the small river on a concrete bridge and then descend a trail that leads downhill. This trail is the most washed out of all the trails. Pass white cliffs and follow the trail down to the river. There are two bridges that cross the river in this section: one is a log and the other is a small suspension bridge. We crossed on the log and continued on the west side of the river to the town Itualo.
From Itualo you have two choices. You can hike directly uphill from town. This looks steep but is the safer hiking trail. The other option is to continue walking along the road and before you cross the bridge, take the trail to the right. This is what we did. It is a beautiful hiking trail but has some exposure and drop offs. Follow the trail as it works its way up the narrow valley and uphill.
After passing over the top of the hill, the trail follows a pretty path through a small valley. There is only a small amount of elevation here but it is a lovely little walk. Once you reach the road, turn left and walk the final way into Chugchilan.
Spend the night at Hostel Cloud Forest.
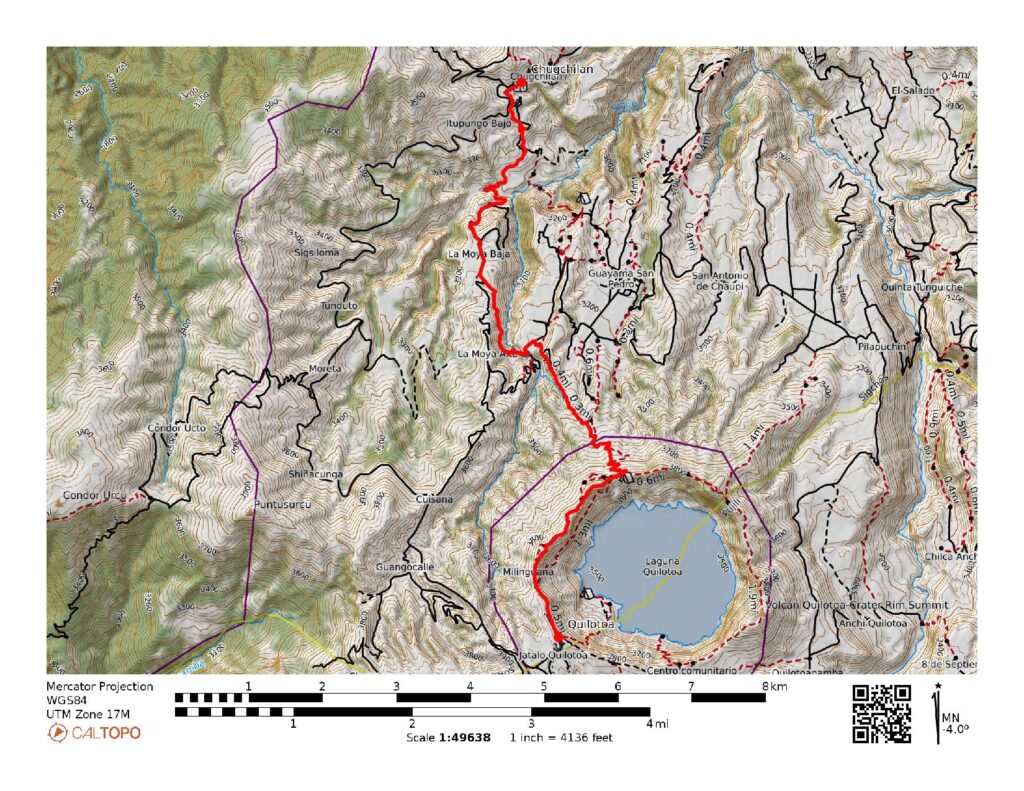
Map of Quilotoa Loop Day 3: Chugchulan to Quilotoa
Distance: 8.5 mile
Elevation Gain: 3,200 feet
Difficulty: Challenging
Time: 4-6 hours
This is the hardest part of the loop, partly because there is a long steep section and partly because you are hiking about 12,000 feet for part of the hike. It is also the most rewarding as you reach the Crater Lake on this hike.
Start the hike by walking to the center of Chugchilan and then descending on a dirt road down into the valley. The road and trail from here is well marked. The trail eventually follows along the western hillside of the valley along a steep slope that does involve some dropoffs. Eventually you cross the river at a very small crossing and ascend to a small gazebo. There is a pretty waterfall here.
Turn left onto the road for a short distance. You will get to a small village. Follow the trial to the right through the village and begin ascending towards the crater. This is the final push and the trail continues steadily uphill for the next mile becoming steep in some sections.
After reaching the top, you have instant views of the crater lake. There is a small snack shop/tea shop here. While it fells like you finished the hike at the this point, you still have a walk along the edge of the rim that still has some up and down sections. If you want a longer hike, take the trail around the east side of the crater (this adds a few hours to the hike). Otherwise, take the upper trail on the west side (counterclockwise) and follow this to the town of Quilotoa.
This was an incredible hike and we were exhausted after hiking for 3 days at this elevation. Make sure to read our complete guide to hiking the Quilotoa Loop and double check directions before using the Quilotoa Loop Map in this post.