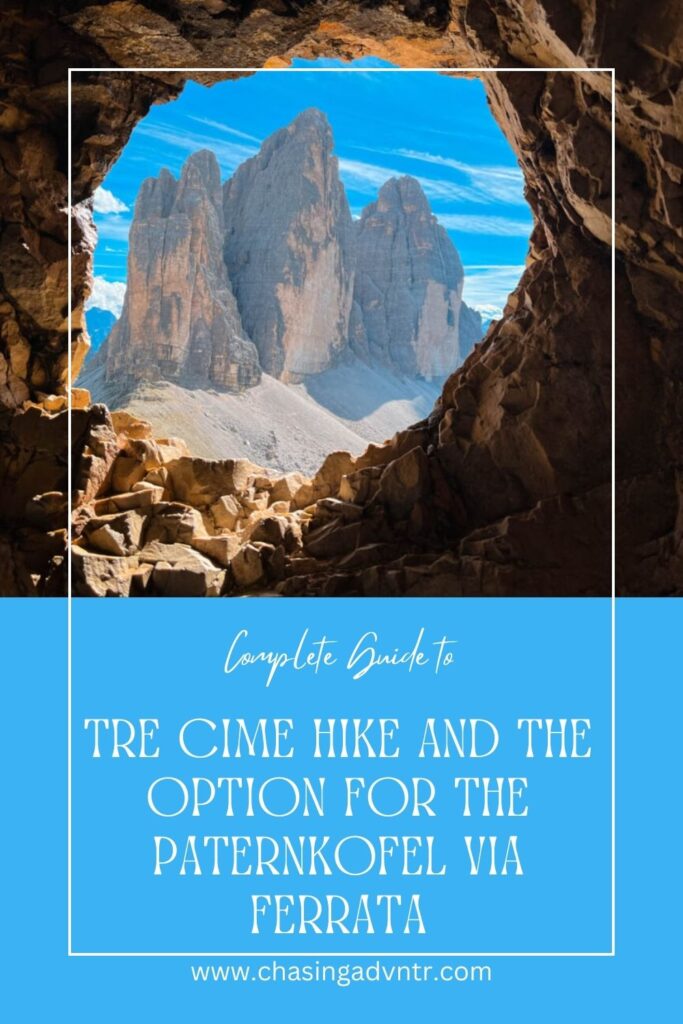
The Tre Cime hike (or Tre Cime di Lavaredo) is one of the most famous hikes in the Dolomites of Italy. This iconic hike takes you high into the mountains in Tre Cime National Park and can be done as an amazing loop trail. If you are looking to add to the adventure and get off the beaten path, you can also consider hiking this as a loop and completing one of the Tre Cime via ferrata up via Paternkofel.
The Tre Cime di Lavaredo via ferrata circuit via Paternkofel takes you high above the traditional hiking trails with epic views of the nearby mountains and a birds eye view of the hiking trails below.
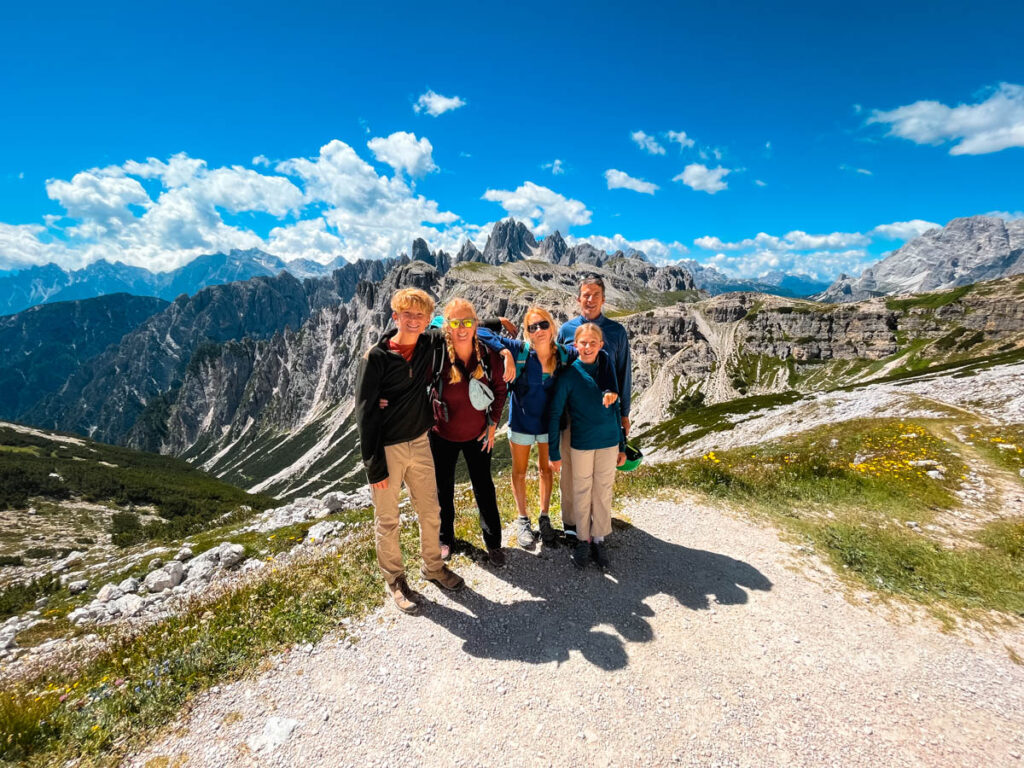
Below you can find information about hiking Tre Cime and the Tre Cime via Ferrata including how to get there, what to expect, and more. We did the Tre Cime hike and the Paternkofel via Ferrata in the summer of 2022 with our 3 kids and will also share what we learned navigating the parking at the start of the Tre Cime di Lavaredo hike.
While this is a relatively easy via ferrata, any adventure activity should be done with safety in mind and at your own risk. This post simply shares our own experience.
Looking for more great things to do in the Dolomites, look at:
- The Legendary Dolomites in the Summer: 1 Week Dolomite’s Itinerary
- Complete Guide to the Stunning Lago Di Braies Hike
- Lago Boe
- The Hike to Rifugio Croda Da Lago: A Complete Guide to Sleeping in an Italian Mountain Hut, Lago Federa, and the Incredible Croda da Lago Loop
- Cycling in the Dolomites: One Day Biking in the Beautiful Selva Di Val Gardena
- The Best Arabba Summer Activities: A Gorgeous Mountain Town in the Heart of the Dolomites
I’ve spent decades exploring family adventures, epic hikes, and National Parks across the world. For more inspiration, check out my National Parks Page or see some of my favorite destinations to plan your next adventure and make sure to join my weekly newsletter.
Quick Look at the Tre Cime Hike and Paternkofel Via Ferrata
Tre Cime Hike: from Tre Cime Rifugio Auronzo to Rifugio A.Locatelli/S.Innerkofler with the Monte Paterno

Distance: 5.5 miles
Elevation Gain: 1900 feet
Difficulty: The trail to Lacatelli is easy/moderate,  the entire trail listed is hard

Time: This hike takes between 3-5 hours
There are two sections of this route to the three peaks of Lavaredo – if you want a more detailed description of this hike, scroll down to the bottom of this post – this section is designed to give you a short snapshot of the hike and the via ferrata.
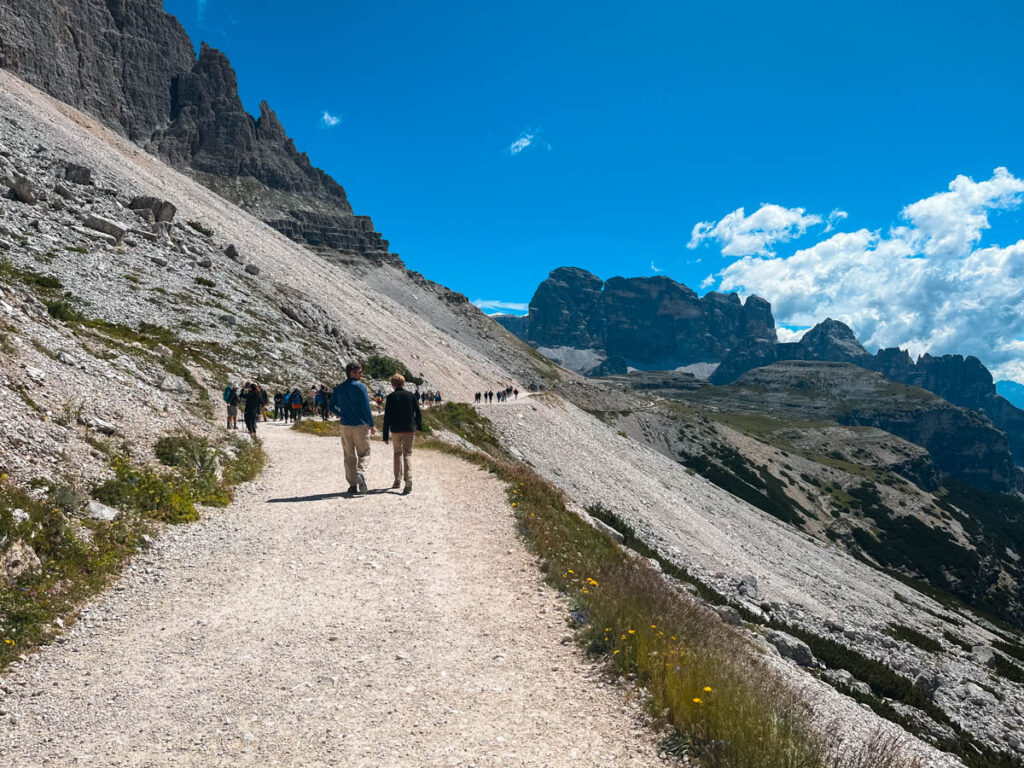
The first section of the hike takes you from the parking area at Tre Cime Rifugio Auronzo to Dreizinnenhütte – Rifugio A.Locatelli/S.Innerkofler. This trail passes by Rifugio Lavaredo.
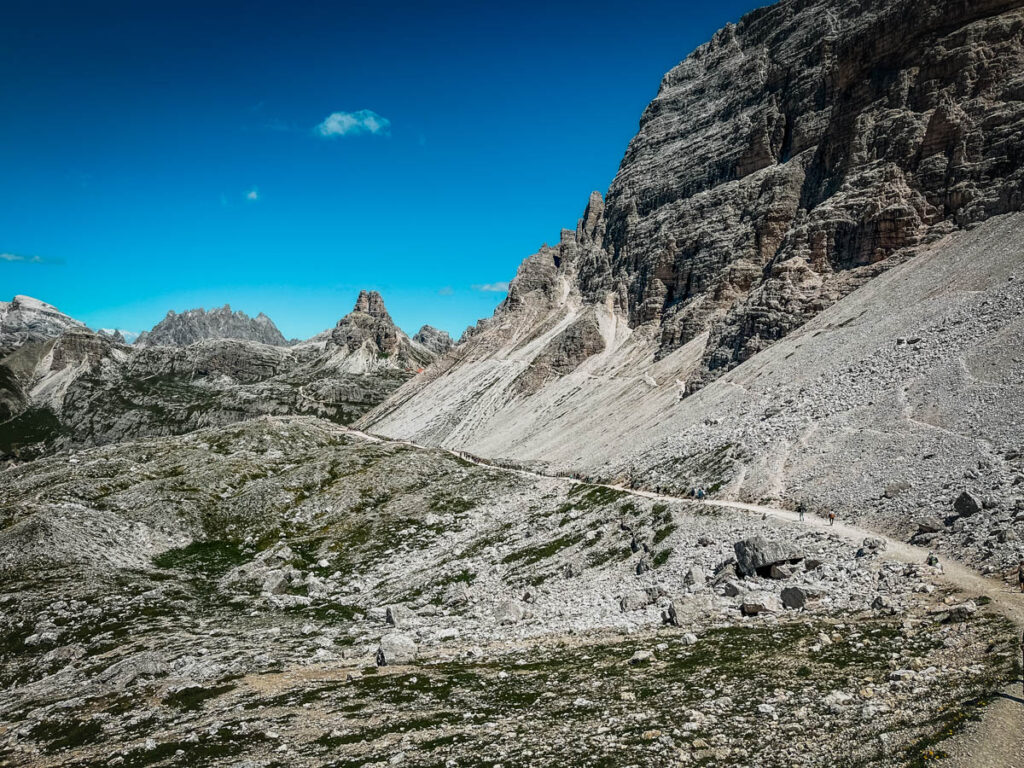
The first section of this hike is the easiest and is on a wide trail that is large enough to drive a car down. There are beautiful views and several small side tracks off the main path. After about 40 minutes of walking (with time to take some photos) you will get to Rifugio Lavaredo.
Above this hut, there are two trails that ascend the hill over the saddle to the next hut. You can takes either of the trails – the trail on the left is steeper but shorter. Both trails take you over the saddle where you get the first iconic views of Tre Cime di Lavaredo. From here several paths descend slightly before ascending to Rifugio A.Locatelli.

Quick Look at the Tre Cime Via Ferrata
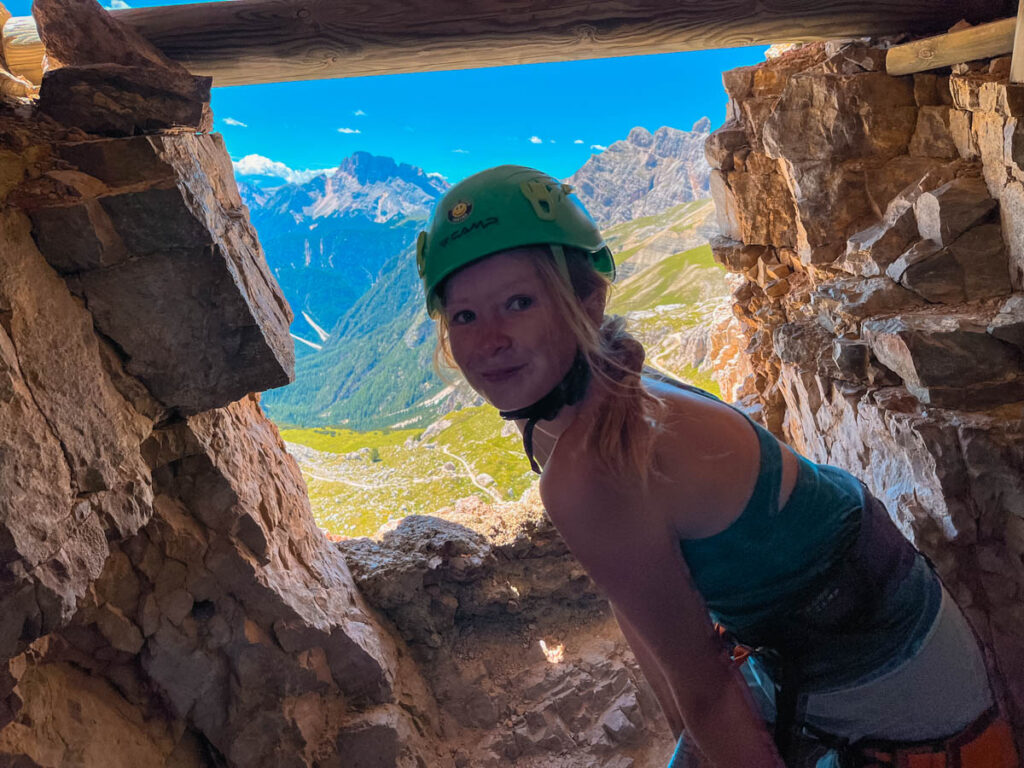
From Rifugio A. Locatelli, the start of the via ferrata is just a short distance away. The via ferrata starts with a walk and climb up through one of the WWII tunnels. You will need a headlamp for this section of the hike. The tunnel is narrow and low in some places.
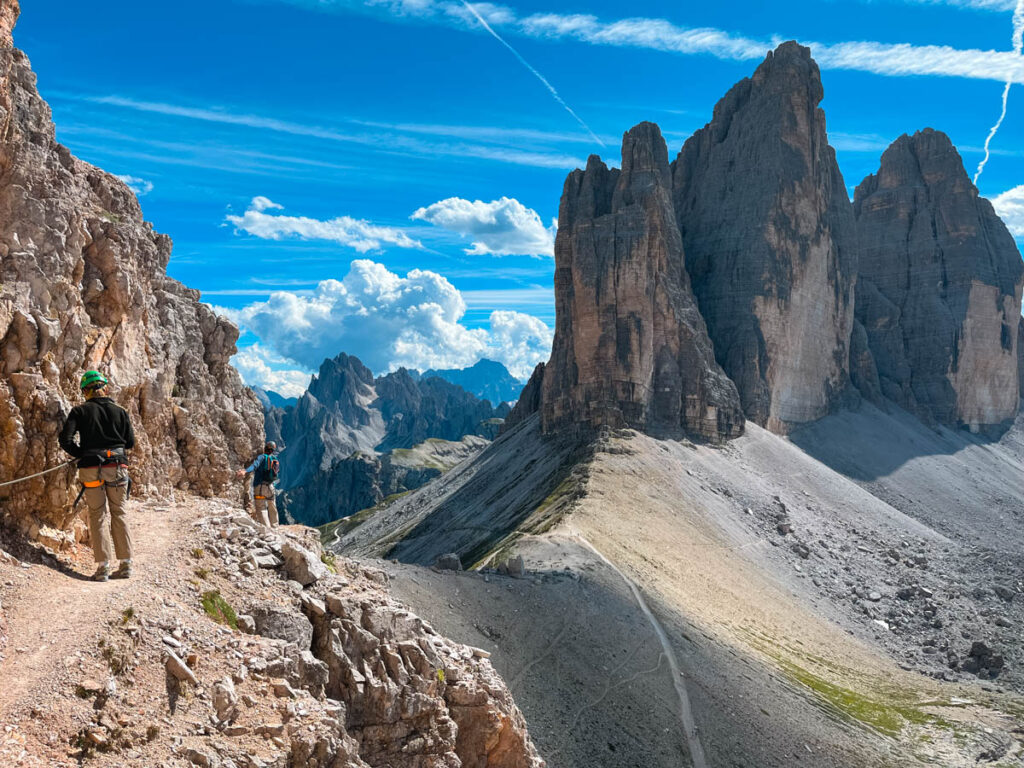
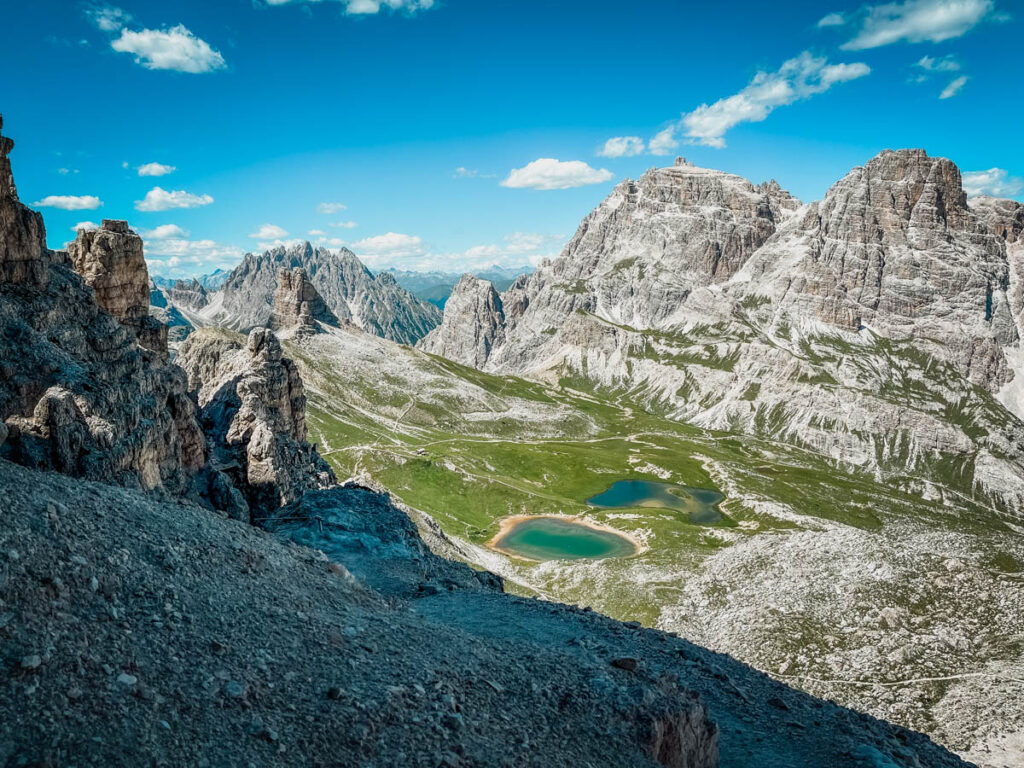
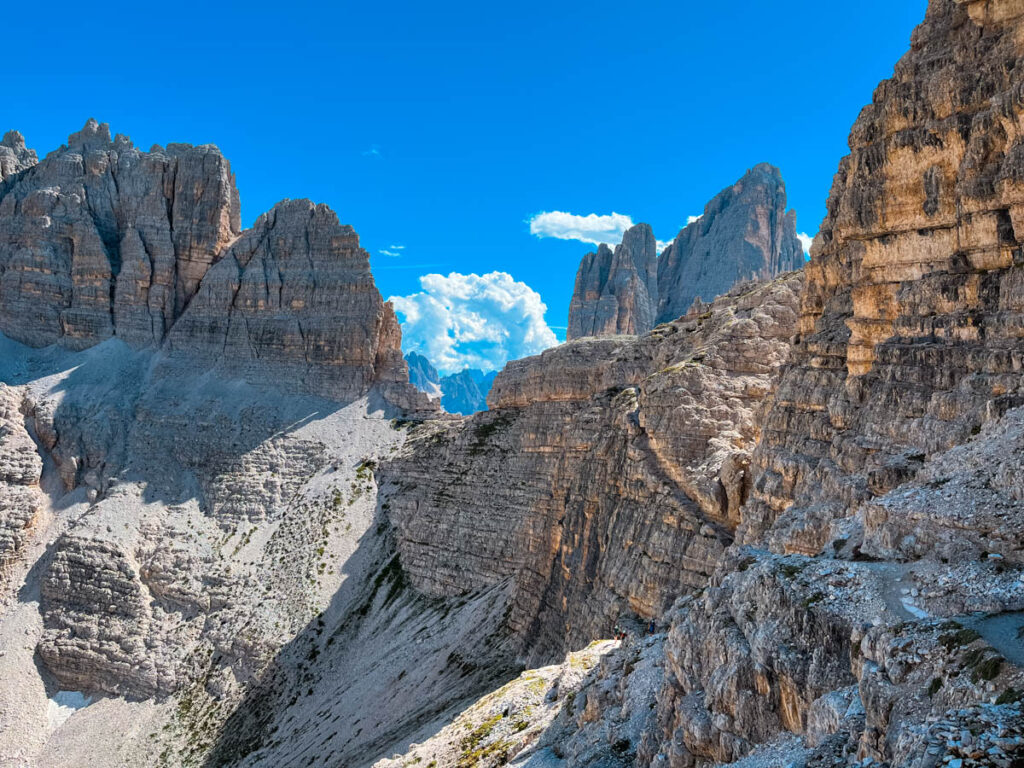
After exiting the cave, you will begin ascending. Several sections have cables to clip in and significant exposure although none of the climbing is difficult. This section of the climb offers exceptional views with two small lakes at the base of the cliff.
The route is obvious and eventually ascents to a small saddle. At this point you have 3 options. The trail to the left is much longer and loops around before returning to the parking lot. The trail to the right ascends to the summit of Paternkofel (this is a short distance, but some of the more challenging climbing of the route).
The shortest route beck descends the gully directly in front of the saddle. The trail here is steep, rough, and unpleasant as it makes its way downhill. There are several winding paths you can follow, but continue to make your way down and to the right until the obvious path leaves on the right. This path follows a crack in the cliff without any cables and is very exposed but wide enough to walk carefully.
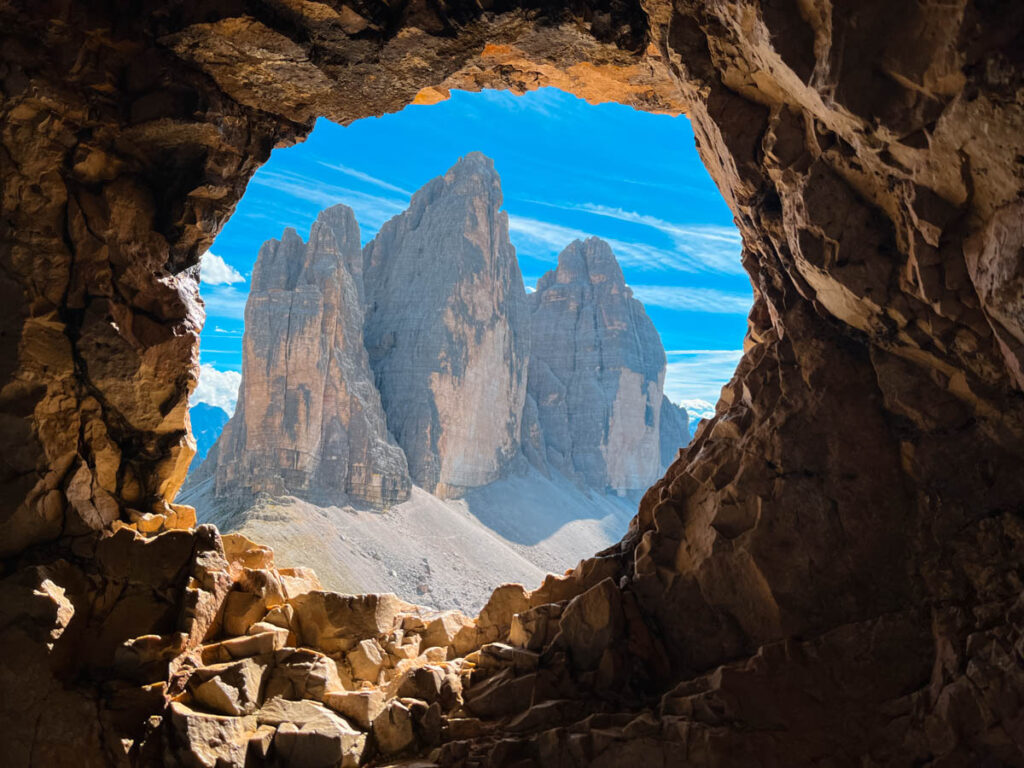
The path goes through several small caves and a few more cabled areas as it makes it’s way back to the other side of the mountains. At this point the Tre Cime di Lavaredo is visible again and the via ferrata meats back up with the saddle above Rifugio Lavaredo.
This loop can also be done in reverse and many people were hiking this routes in both directions.
How to get to Tre Cime di Lavaredo
Getting to the start of the Tre Cime hike can be its own challenge. The incredible popularity of this hike has lead to some changes in parking and the entrance into the park. There is now a limit to the number of cars that can access the Tre Cime hike each day and you will need to pay a fee to park. Once the parking fills up, you will no longer be permitted to drive into the gate. There is a fee of 30 euros to enter the gate.
We arrived around 9:15 and the parking was backed up for about 1 mile. Cars were slowly entering, but we were one of the last cars to get access through the gate. Try to arrive as early as possible to make sure you can get parking.
It is also possible to take a bus to the start of the hike. Based on the uncertainty of getting your car in the gate, parking and taking a bus seems like a really good option.
The road up to the start of the Tre Cime hike is open starting in June and closes in the early fall months depending on the weather. You can find out road conditions and opening information on the official Tre Cime website.
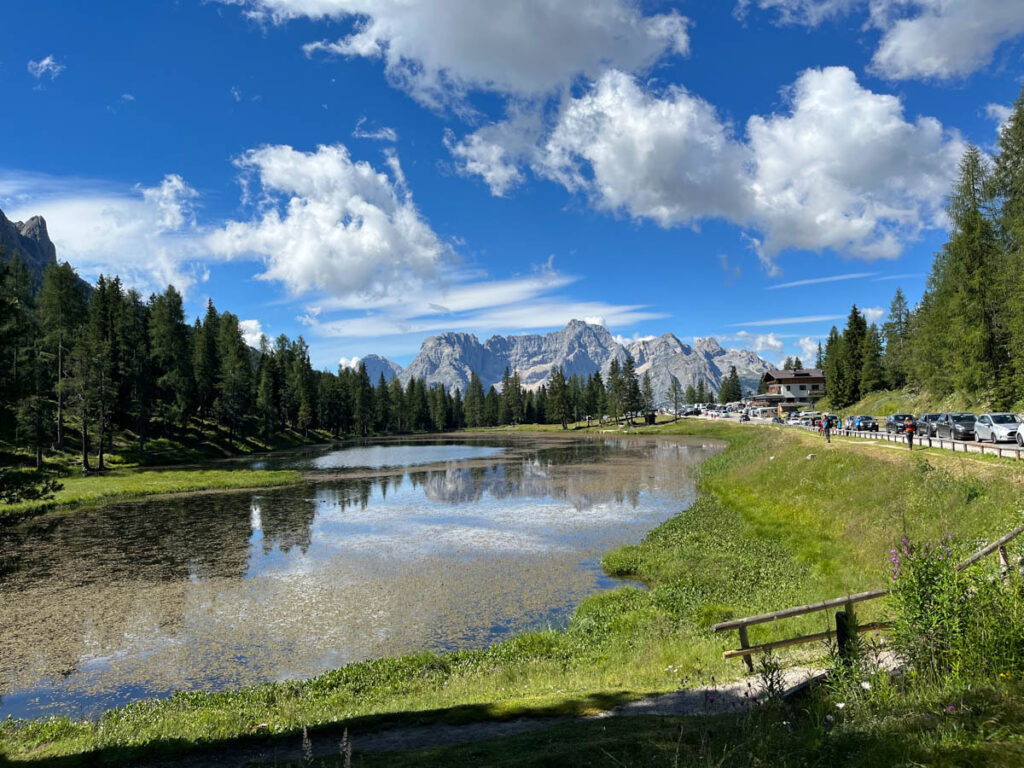
Below you can find a map that shows the Rifugio Auronzo which is where you will park to hike to Tre Cime di Lavaredo, Dolomites. From Cortina d’Ampezzo, take route SR 48 and turn left on SR 49. You will pass Misurina and turn right to follow signs to Tre Cime. After passing Lago Antorno you will find a gate where you will need to pay. It is possible to park here and take the bus, or even hike from here up to the Tre Cime area. We found cars waiting and backed up all along the lake.
Without traffic, the drive from Cortina to Tre Cime, the drive takes about 40 minutes.
Once we made it through the gate, and drove up the Rifugio Auronzo toll road to the parking area, we found parking attendants directing cars. We got one of the last parking spots. If you are planning to hike and not do the via ferrata and you can’t get an early start, you can also consider waiting until later in the day to hike. When we finished our hike around 4:00 there were very few cars and people.
Map of Tre Cime Hike and Paternkofel Via Ferrata
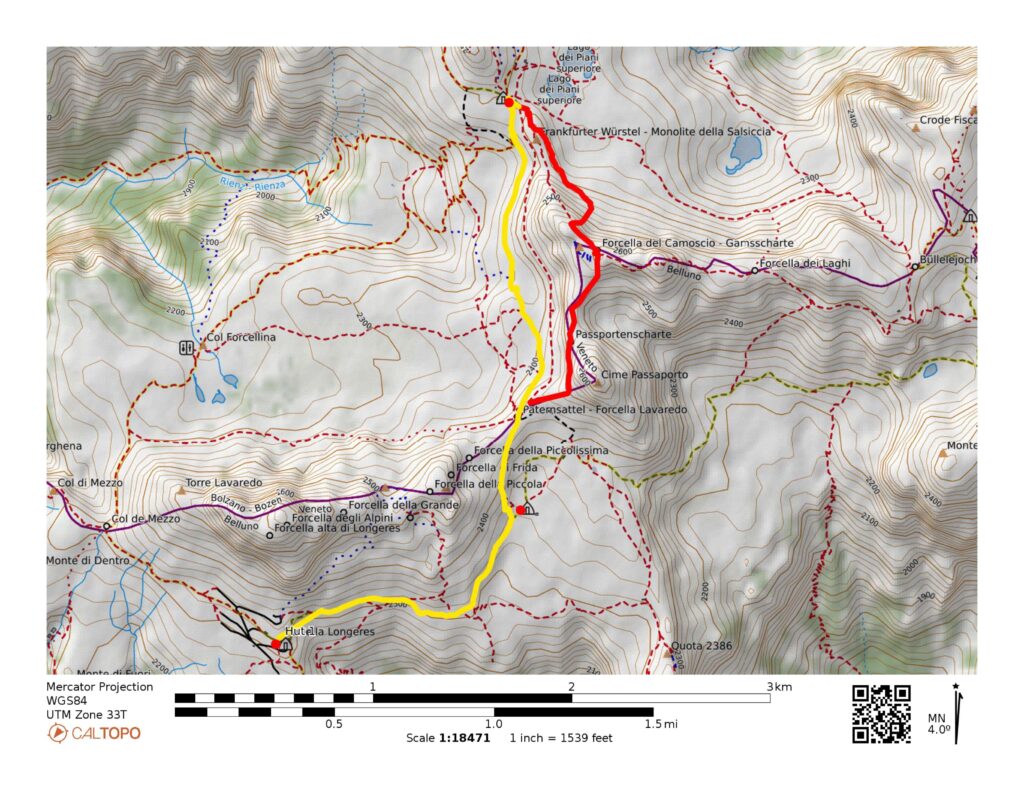
The map below shows the hike to the hut in yellow and the via ferrata in red. Note that there are many many options for hiking in the Tre Cime di Lavaredo area and you can see many of the hiking trails on the map below. You can put together a few loops or out and back options. The via ferrata below adds another element to the hike and gets you off the beaten path. There are several other via ferrata routes as well.
Things to Know About visiting Tre Cime
When is the Best Time of Year to do the Tre Cime Hike?
The best time to do the Tre Cime hike and the via ferrata Paternkofel is during the warm season between June and September. After this the road may close and snow and ice will make the hiking and climbing more challenging. Even during the summer months, the temperatures inside the caves on the via ferrata are cold, so dress warmly.
What is the Typical Tre Cime Weather in the Summer?
You can (and should) check the Tre Cime di Lavaredo weather prior to doing the Tre Cime hike. Weather in the mountains can always be unpredictable, so be prepared for changing conditions. Between June and August daytime temperatures are typically in the mid 50s in the Tre Cime hiking area. Note that even when the temperatures on the valley floor reach the 80s, the temperatures in the mountains are likely much colder. Like other mountainous areas, it’s not uncommon to have afternoon rain showers.
The via ferrata Paternokofel has several tunnels. These tunnels are significantly colder then the outdoor temperature, so dress appropriately.
How Long is the Tre Cime Hike?
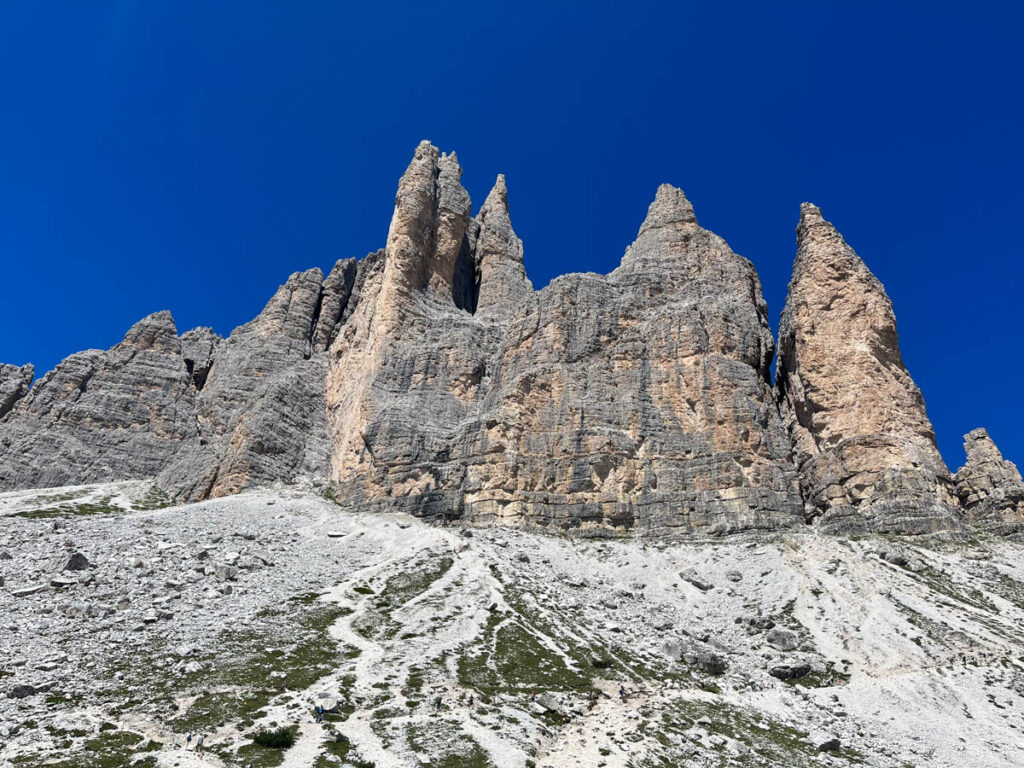
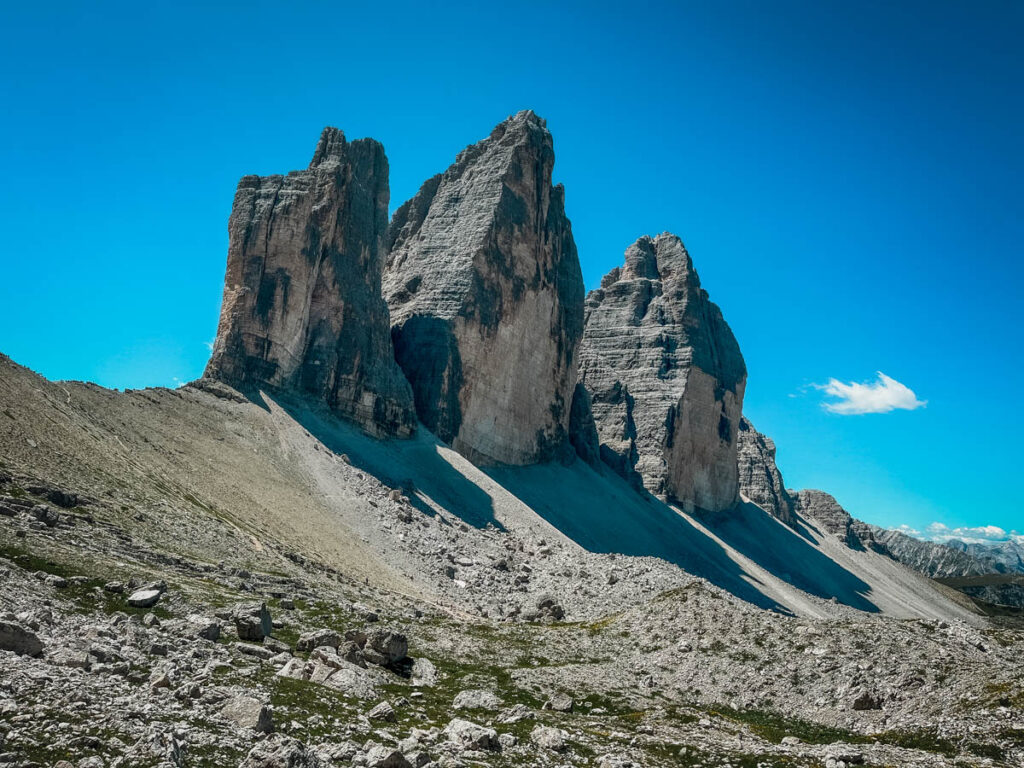
There are many routes for hiking Tre Cime di Lavaredo. In order to see the classic view of the Tre Cime di Lavaredo, you will need to hike to Forcelle di Lavaredo. This takes about 1 hours each way and is the very minimum you should plan. If you are ecited to hike further, the Tre Cime circuit is about 8.5 miles and takes between 3-5 hours to complete.
To do the Tre Cime hike with the Paternkofel via ferrata, you will need about 3-5 hours (longer if the via ferrata is crowded as you will need to wait along the way).
Is the Tre Cime Hike worth it?
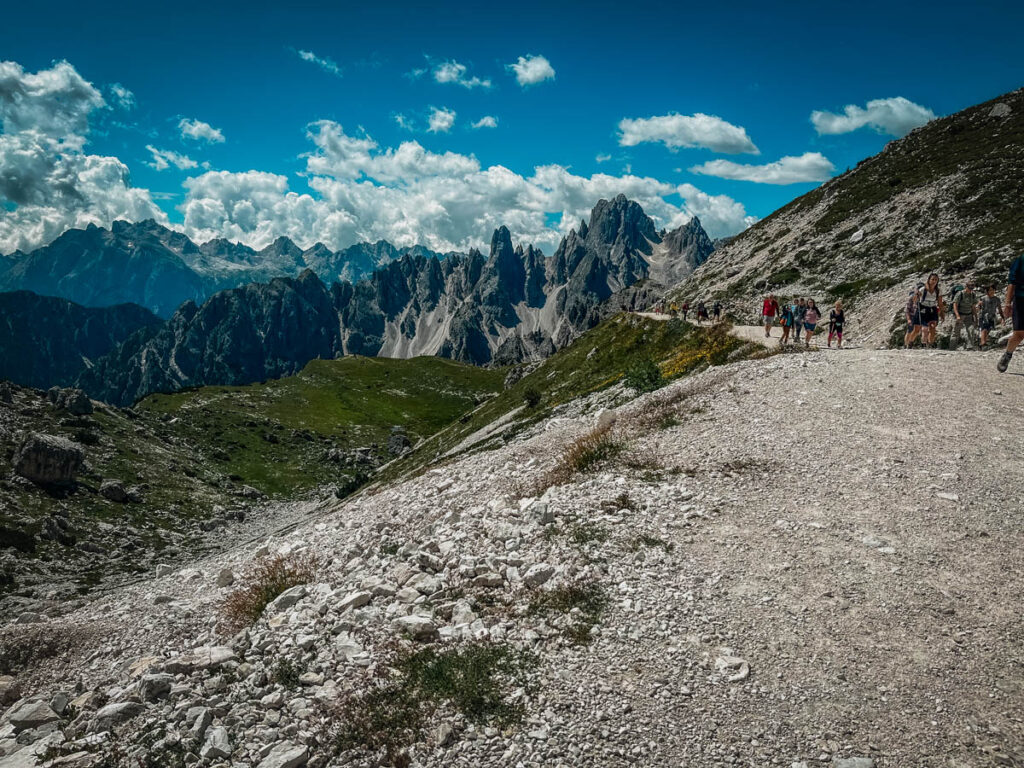
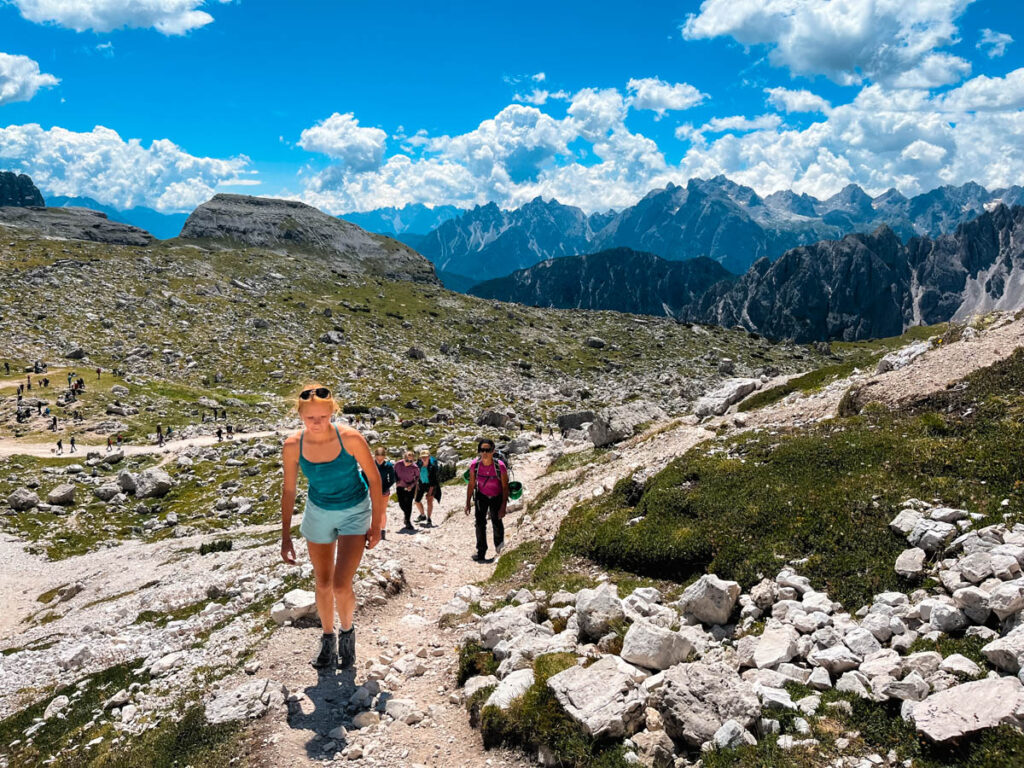
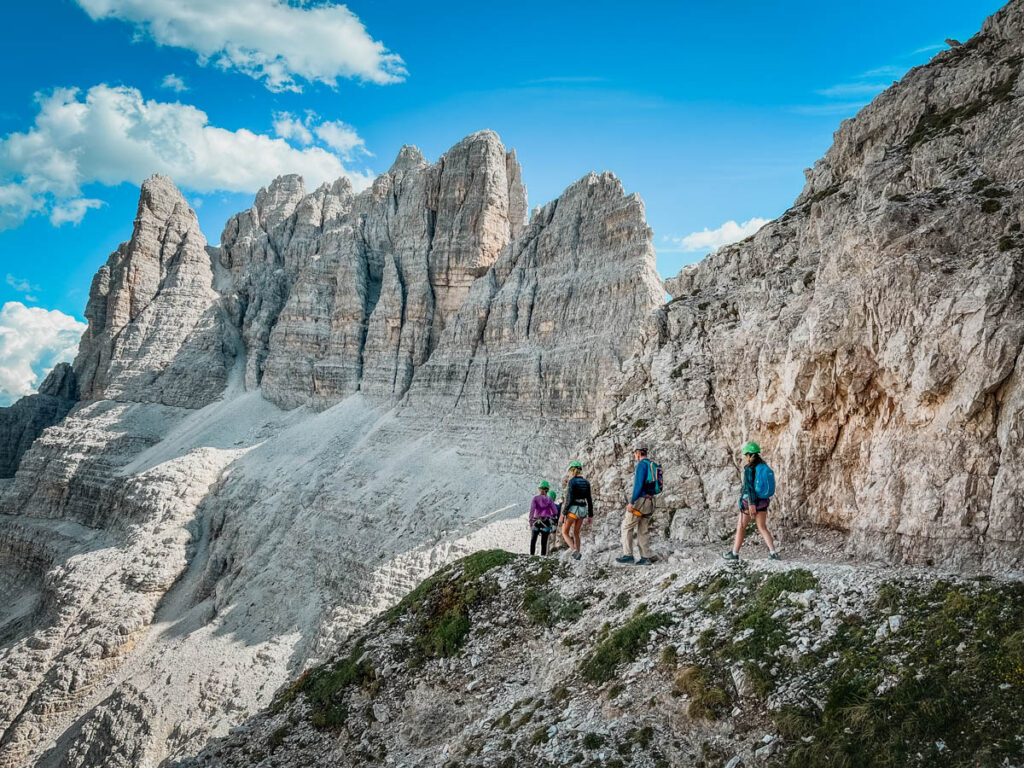
The Tre Cime hike is incredible and absolutely worth doing even though it is crowded and popular – sometimes the best hikes live up to the expectation and this hike is no exception. While the first part of this hike is crowded, the further along you get the fewer people you will find. There is no part of this hike that doesn’t have stunning views.
How Hard is the Via Ferrata Paternkofel (Paterno)?
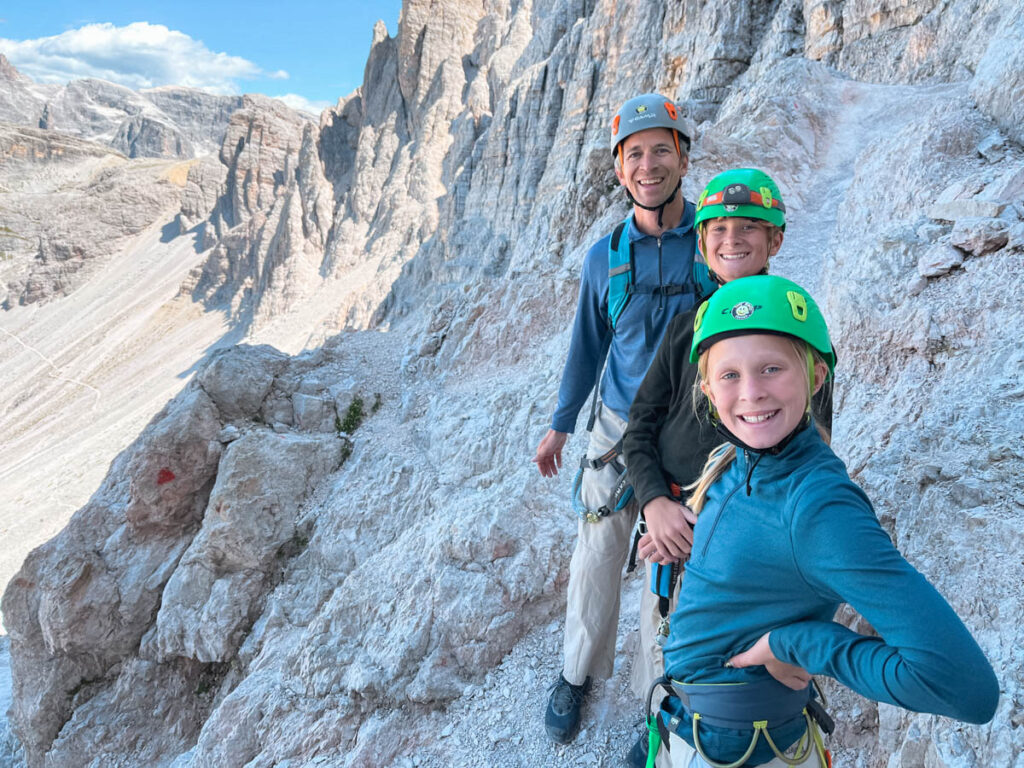
The via ferrata Paterno is an excellent route and is generally easy for anyone with climbing and via ferrata experience. The climb is exposed in several areas, but almost all these exposed areas have cables for you to clip into. We did this via ferrata as a large group with 5 kids ranging in age from 10-15. If this is your first via ferrata, you may want to consider doing a guided tour prior to doing the route on your own.
Based on the location, the difficulty and the surrounding area, this is one of the best Italy via ferrata options for beginners and intermediate climbers.
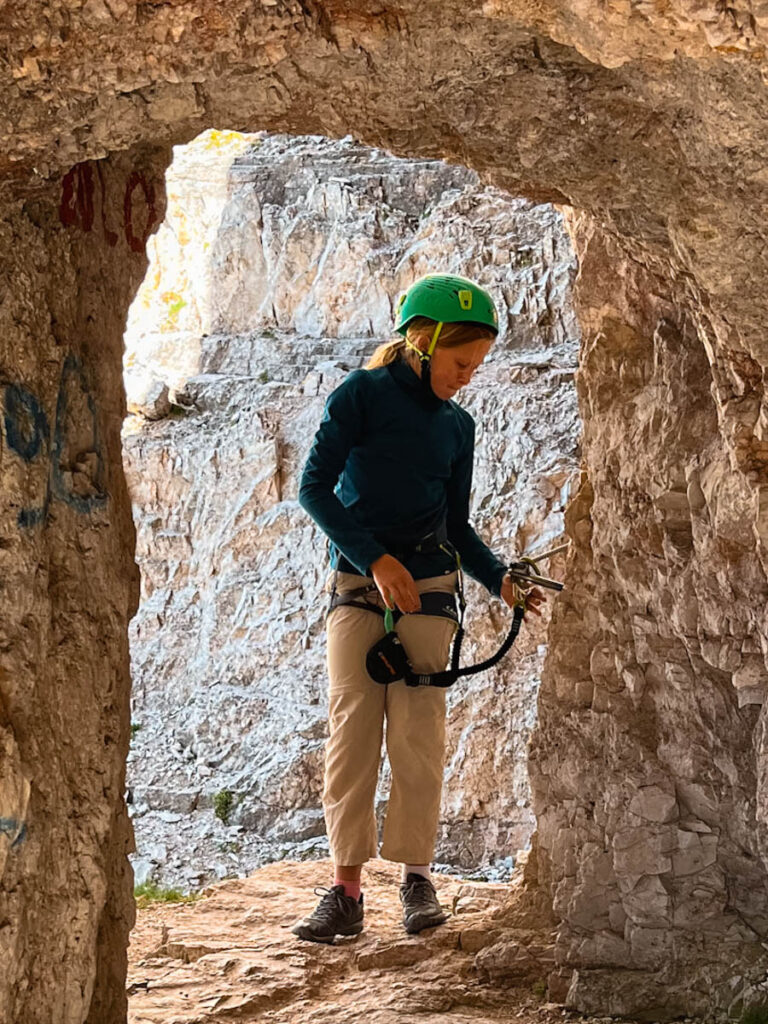
What Gear do you Need for the Via Ferrata Paterno?
There are several shops where you can rent gear for the via ferrata in Cortina d’Amprezzo. You will want to rent a complete via ferrata kit. Check out Snow Service Cortina for some gear or search for other nearby shops. You can of course bring your own gear as well.

At a minimum, via ferrata kit includes: a helmet, a harness, and a lanyard. The lanyard will have 2 carabiners connected to a release. This allows you to fall and have some give as the webbing in the release pulls out.
Make sure you get the correct size harness and helmet and know how to the use the equipment.
You should also have a headlamp for this hike as you pass through several tunnels.
Where to Stay near Tre Cime (or the three peaks Dolomites)
If you are spending a few days in the Dolomites, Cortina d’Ampezzo is the easiest place to stay near Tre Cime. You can also find some lodging options closer to Tre Cime, or you can consider staying in one of the mountain huts.
Albergo Chalet Lago Antorno – One of the closest places to stay near Tre Cime, you have lovely views of the lake.
Quinz – Locanda Al Lago – this is a beautiful lakefront hotel on lake Misurina.
If you’re planning on camping, Tre Cime di Lavaredo has several options nearby.
- Camping Cortina
- International Camping Olympia
Another fabulous option is to find a mountain Refugio.
As always, practice leave no trace and stay on the trails to help preserve this alpine environment for others.
Complete Description of the Tre Cime Hike
This trail description starts at Rifugio Auronzo and ends at Rifugio Locatelli. From here you will begin the via ferrata route. This links back up with the trail and you will finish that last section on the same trail you hiked on to start. Below you can see the separate sections of the hike.
RIFUGIO AURONZO TO RIFUGIO LAVAREDO
Start your hike on route 101. This is a wide and very easy hiking trail. The trail is mostly flat and passes Cappella degli Alpini, and the optional side trail off to your right that leads to two monuments. The trail has beautiful views of the Auronzo Valley and one side of the Tre Cime peaks.
This section of the trail ends at Rifugio Lavaredo. You can stop here from some food or to refill your water.
RIFUGIO LAVAREDO TO FORCELLA LAVAREDO
The next section leaves from the Rifugio and ascends to the saddle (or Forcella Lavaredo). There are two trails that take you to Forcella Lavaredo. The left trail starts off steep, but is overall shorter. The trail on the right has a large switchback and a gradual ascent to the saddle. Once you reach the top of this section, you have a new and incredible view of Tre Cime.
We ascended the left side trail and came down the right side trail. The trails are still fairly wide but less than the first section of the trail.
FORCELLA LAVAREDO TO RIFUGIO LOCATELLI
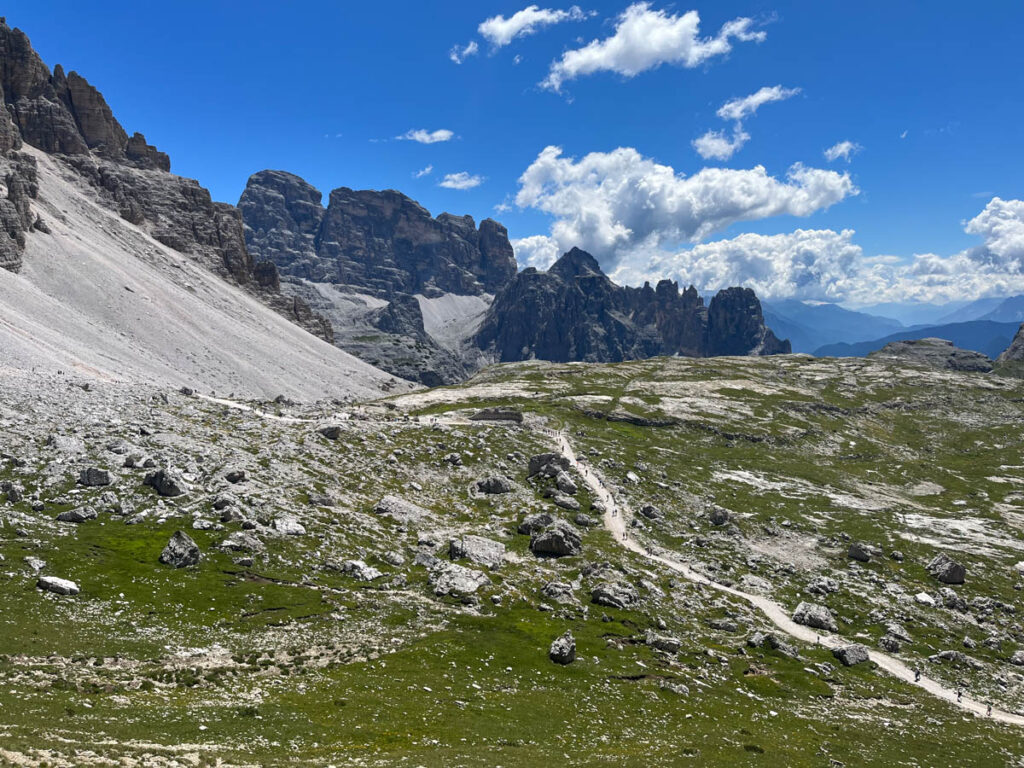
From the saddle (or Forcella Lavaredo) it’s about a 2 km walk to Rifugio Locatelli. There are actually several trails you can take, but the easiest trail is the large wide path that descends slightly and then gradual makes it’s way uphill to Rifugio Locatelli. This is a large hut and was very crowded when we visited. There is a large deck, perfect for eating lunch. The view of Tre Cime are incredible.
From Rifugio Locatelli, you can either retrace your steps back to the car, complete the Tre Cime circuit by continuing on the hiking trails in a counterclockwise direction. We returned by taking the via feratta Monte Paterno.
Description of the Tre Cime Via Feratta Monte Paterno
To reach the start of the via ferrata Paternkofel. ascend from the Rifugio. If you are standing looking at the large map looking north, follow the trail uphill to the right. It is a small path from here. After 5-10 minutes of walking you will see the start of via ferrata with the entrance of the tunnel.
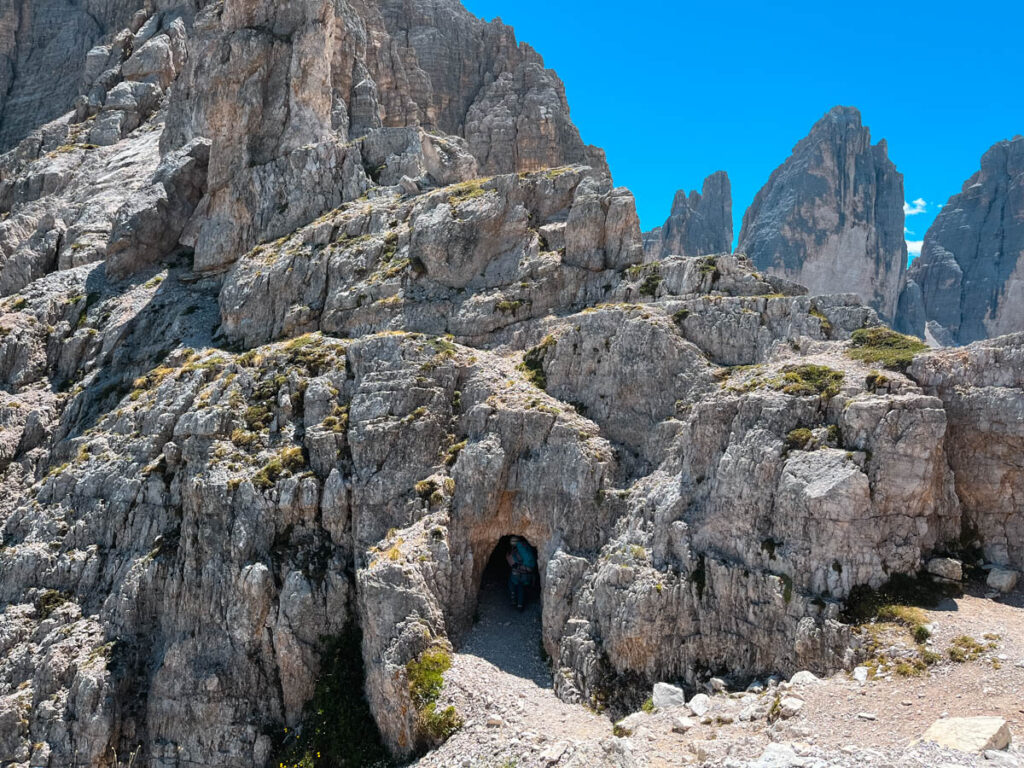
The first section of the via ferrata ascends through an old WWII tunnel. It is quite dark with a series of stairs that lead straight up and forward for about 10 minutes. You absolutely need to have a light and use caution as it can be slippery in the cave.
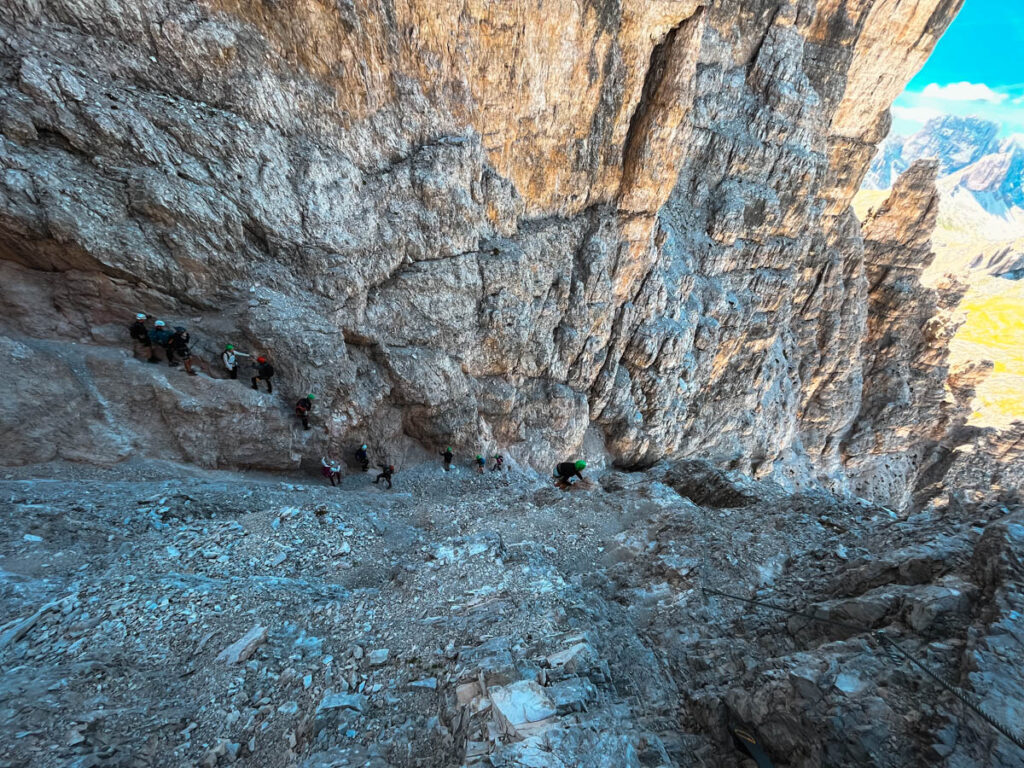
You will come out of the cave. The next section is a series of climbs assisted with cables and traverses that continue further along the path. None of the climbs in this section are particularly challenging, but there is a decent amount of exposure and some steep sections. Since this is a popular route, you will also likely encounter many people climbing the opposite direction and you will need to pause a few times to wait for other climbers.

After a final steep section, you will reach a saddle just below Monte Paterno. At this point you have 3 options – finish the short climb to the summit of Monte Paterno, take the obvious trail along the cliff to the left for a longer route back to the parking lot, or heading straight down the hill to the shortest route back.
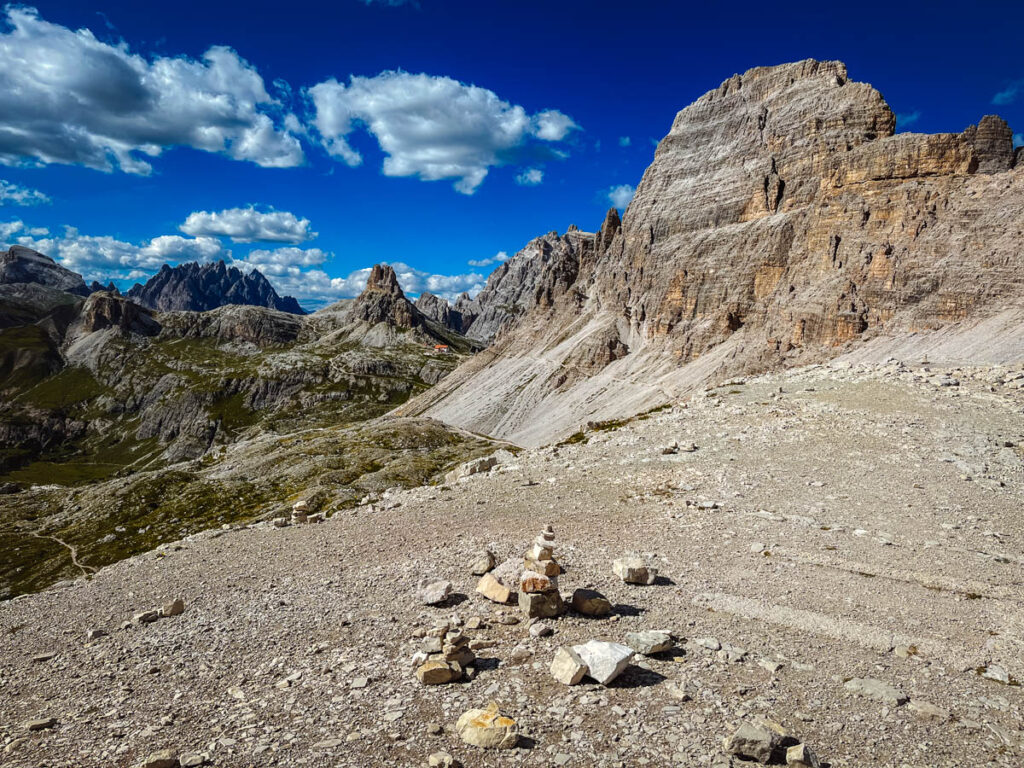
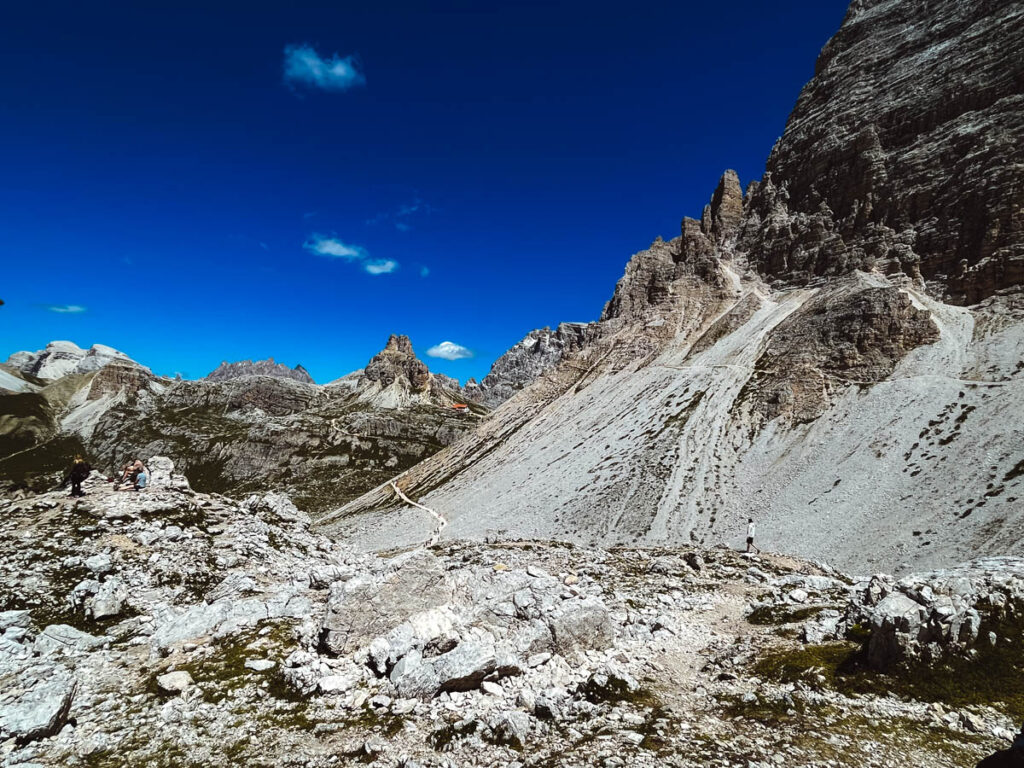
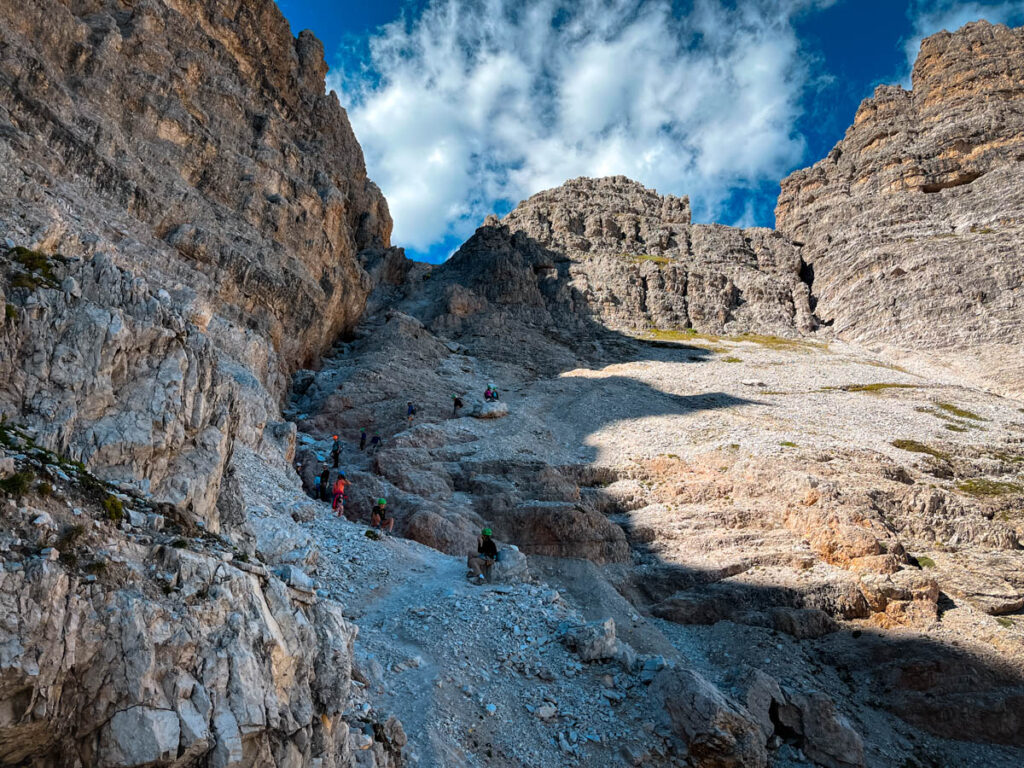
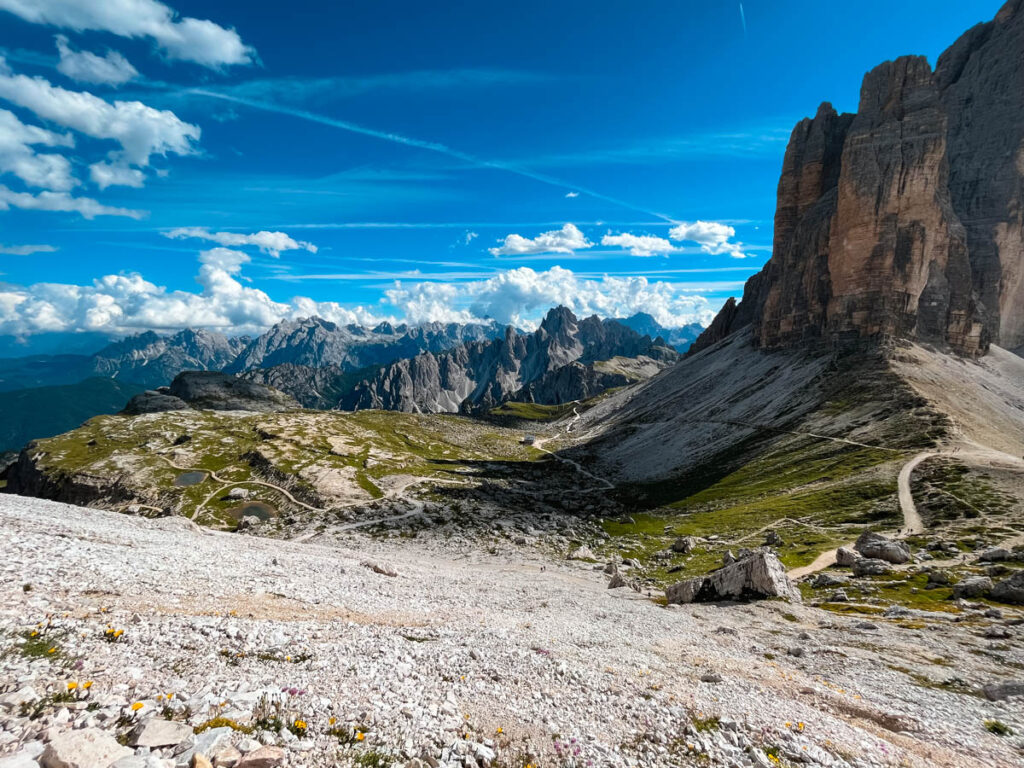
The trail straight down the gully in front of you in not obvious and there are many winding paths that are steep and a bit uncomfortable to climb down. The image below shows this gully looking back up and you can see the saddle on the lowest point. As you reach the bottom of this section, continue to bear to the right and the trail becomes more obvious.
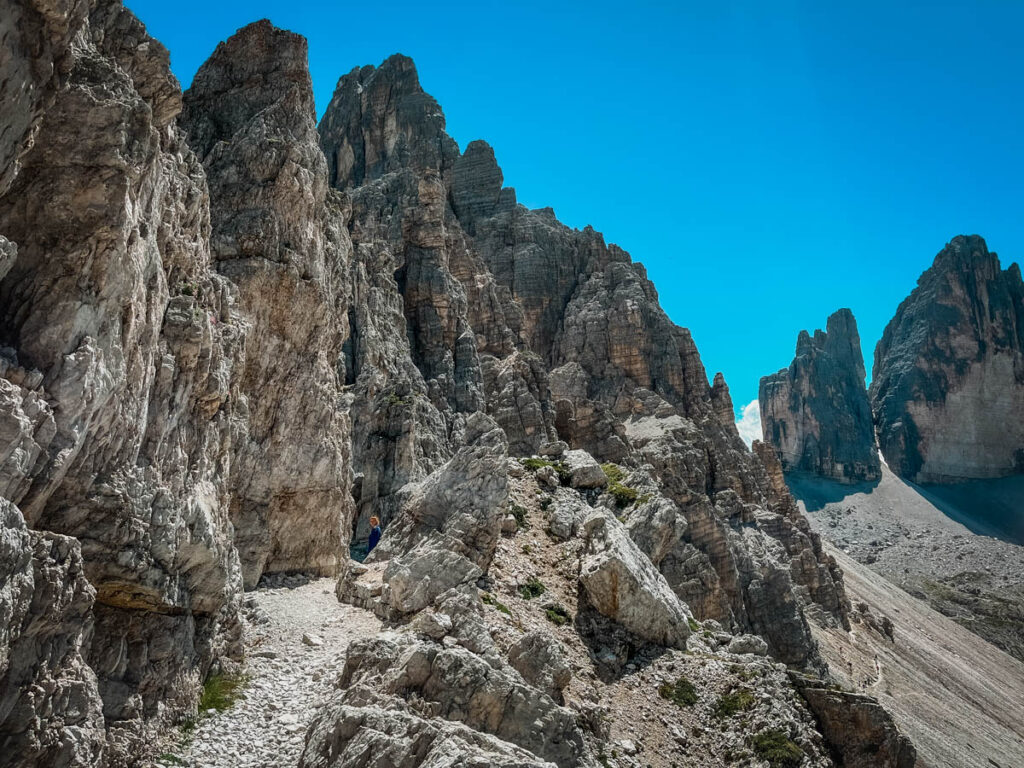
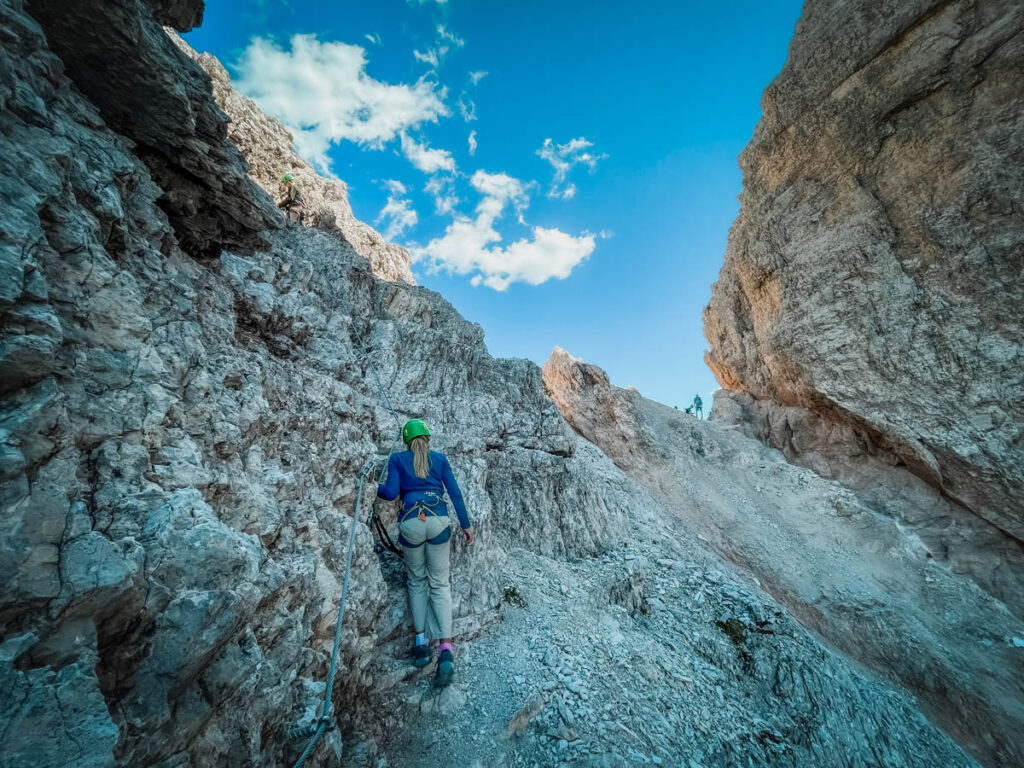
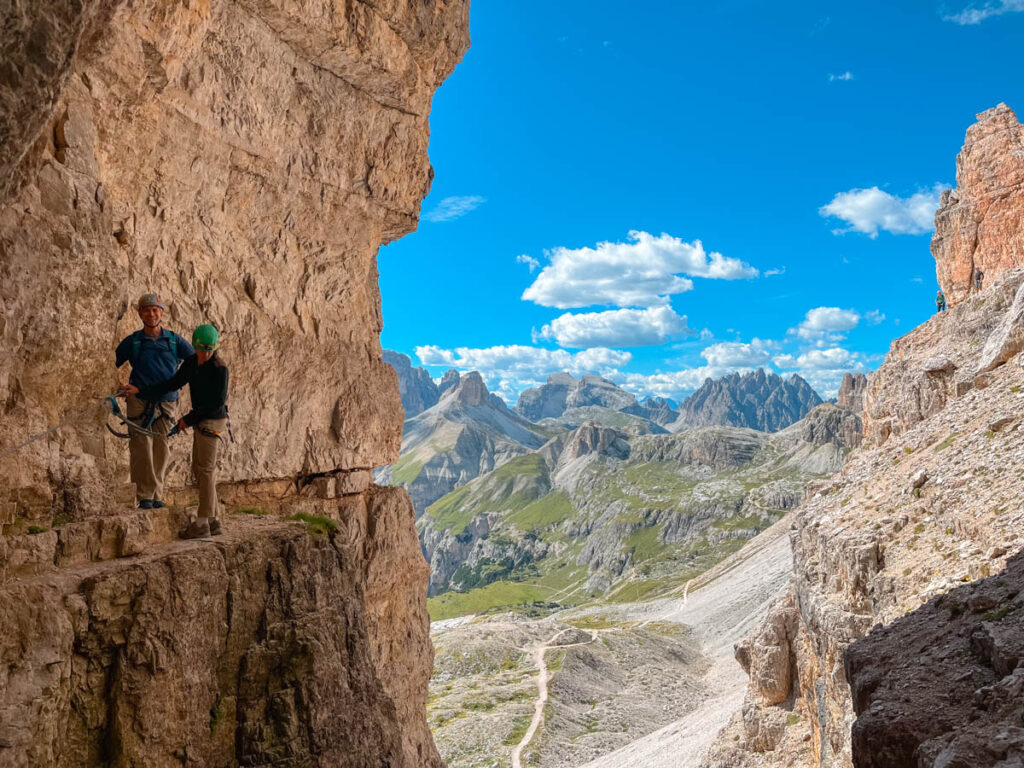
The trail continues to the right and follows along a cliff. The trail itself is wide and easy to walk, but is incredibly exposed. Stay against the cliff and pay attention. You can see the path in the image below.
After passing through another low point, the Tre Cime de Lavaredo comes into view again and you will follow the last section of the via ferrata downhill to meet up with the original path at Forcella Lavaredo. This section has several traverses and some areas where you will pass through some small and narrow tunnels and along cliff edges. There was no especially challenging or technical climbing in this section.

The final section of this trail descends down a hillside to Forcella Lavaredo and continue down to Rifugio Lavaredo. From here you will trace yourself back to the parking lot following the original trail you hiked in on.
This is the end of this incredible Tre Cime hike and via ferrata Paternkofel. Drop a comment and let us know about the hike or leave a question and we’ll update this article.